Super

In Rhode Island School of Design, there are two semesters. However, there is one additional time period in-between called Wintersession, where you can take classes of your choosing either for fun or for learning. I never took any formal photography classes before so for my freshman year, I took a class called Photo Intensive. This course really inspired me to take my photography to the next level.

I had a lot of time to experiment for this class and the result was a series I entitled “Super”. The idea for this series explores the power of photography. I wanted to create photos of surreal moments that portray me more than just human. I wanted to compel people to look twice and feel a sense of fear or confusion.

This series was mainly created using composites, combining two different images into one image. This was also my first attempt into this kind of photography. I made a lot of mistakes and took me a lot longer than it should have. I want to share my process so that you will have an easier time when you create your own composites.

I’ve given tips on composites on my previous post but I still have more to share. When making composites, it’s important that your subject fits the background seamlessly. This includes their sharpness and focus. Make sure that the subject fits the sharp parts of the photo. To make this easier, use a high aperture of about f/8 to make sure everything is in focus.

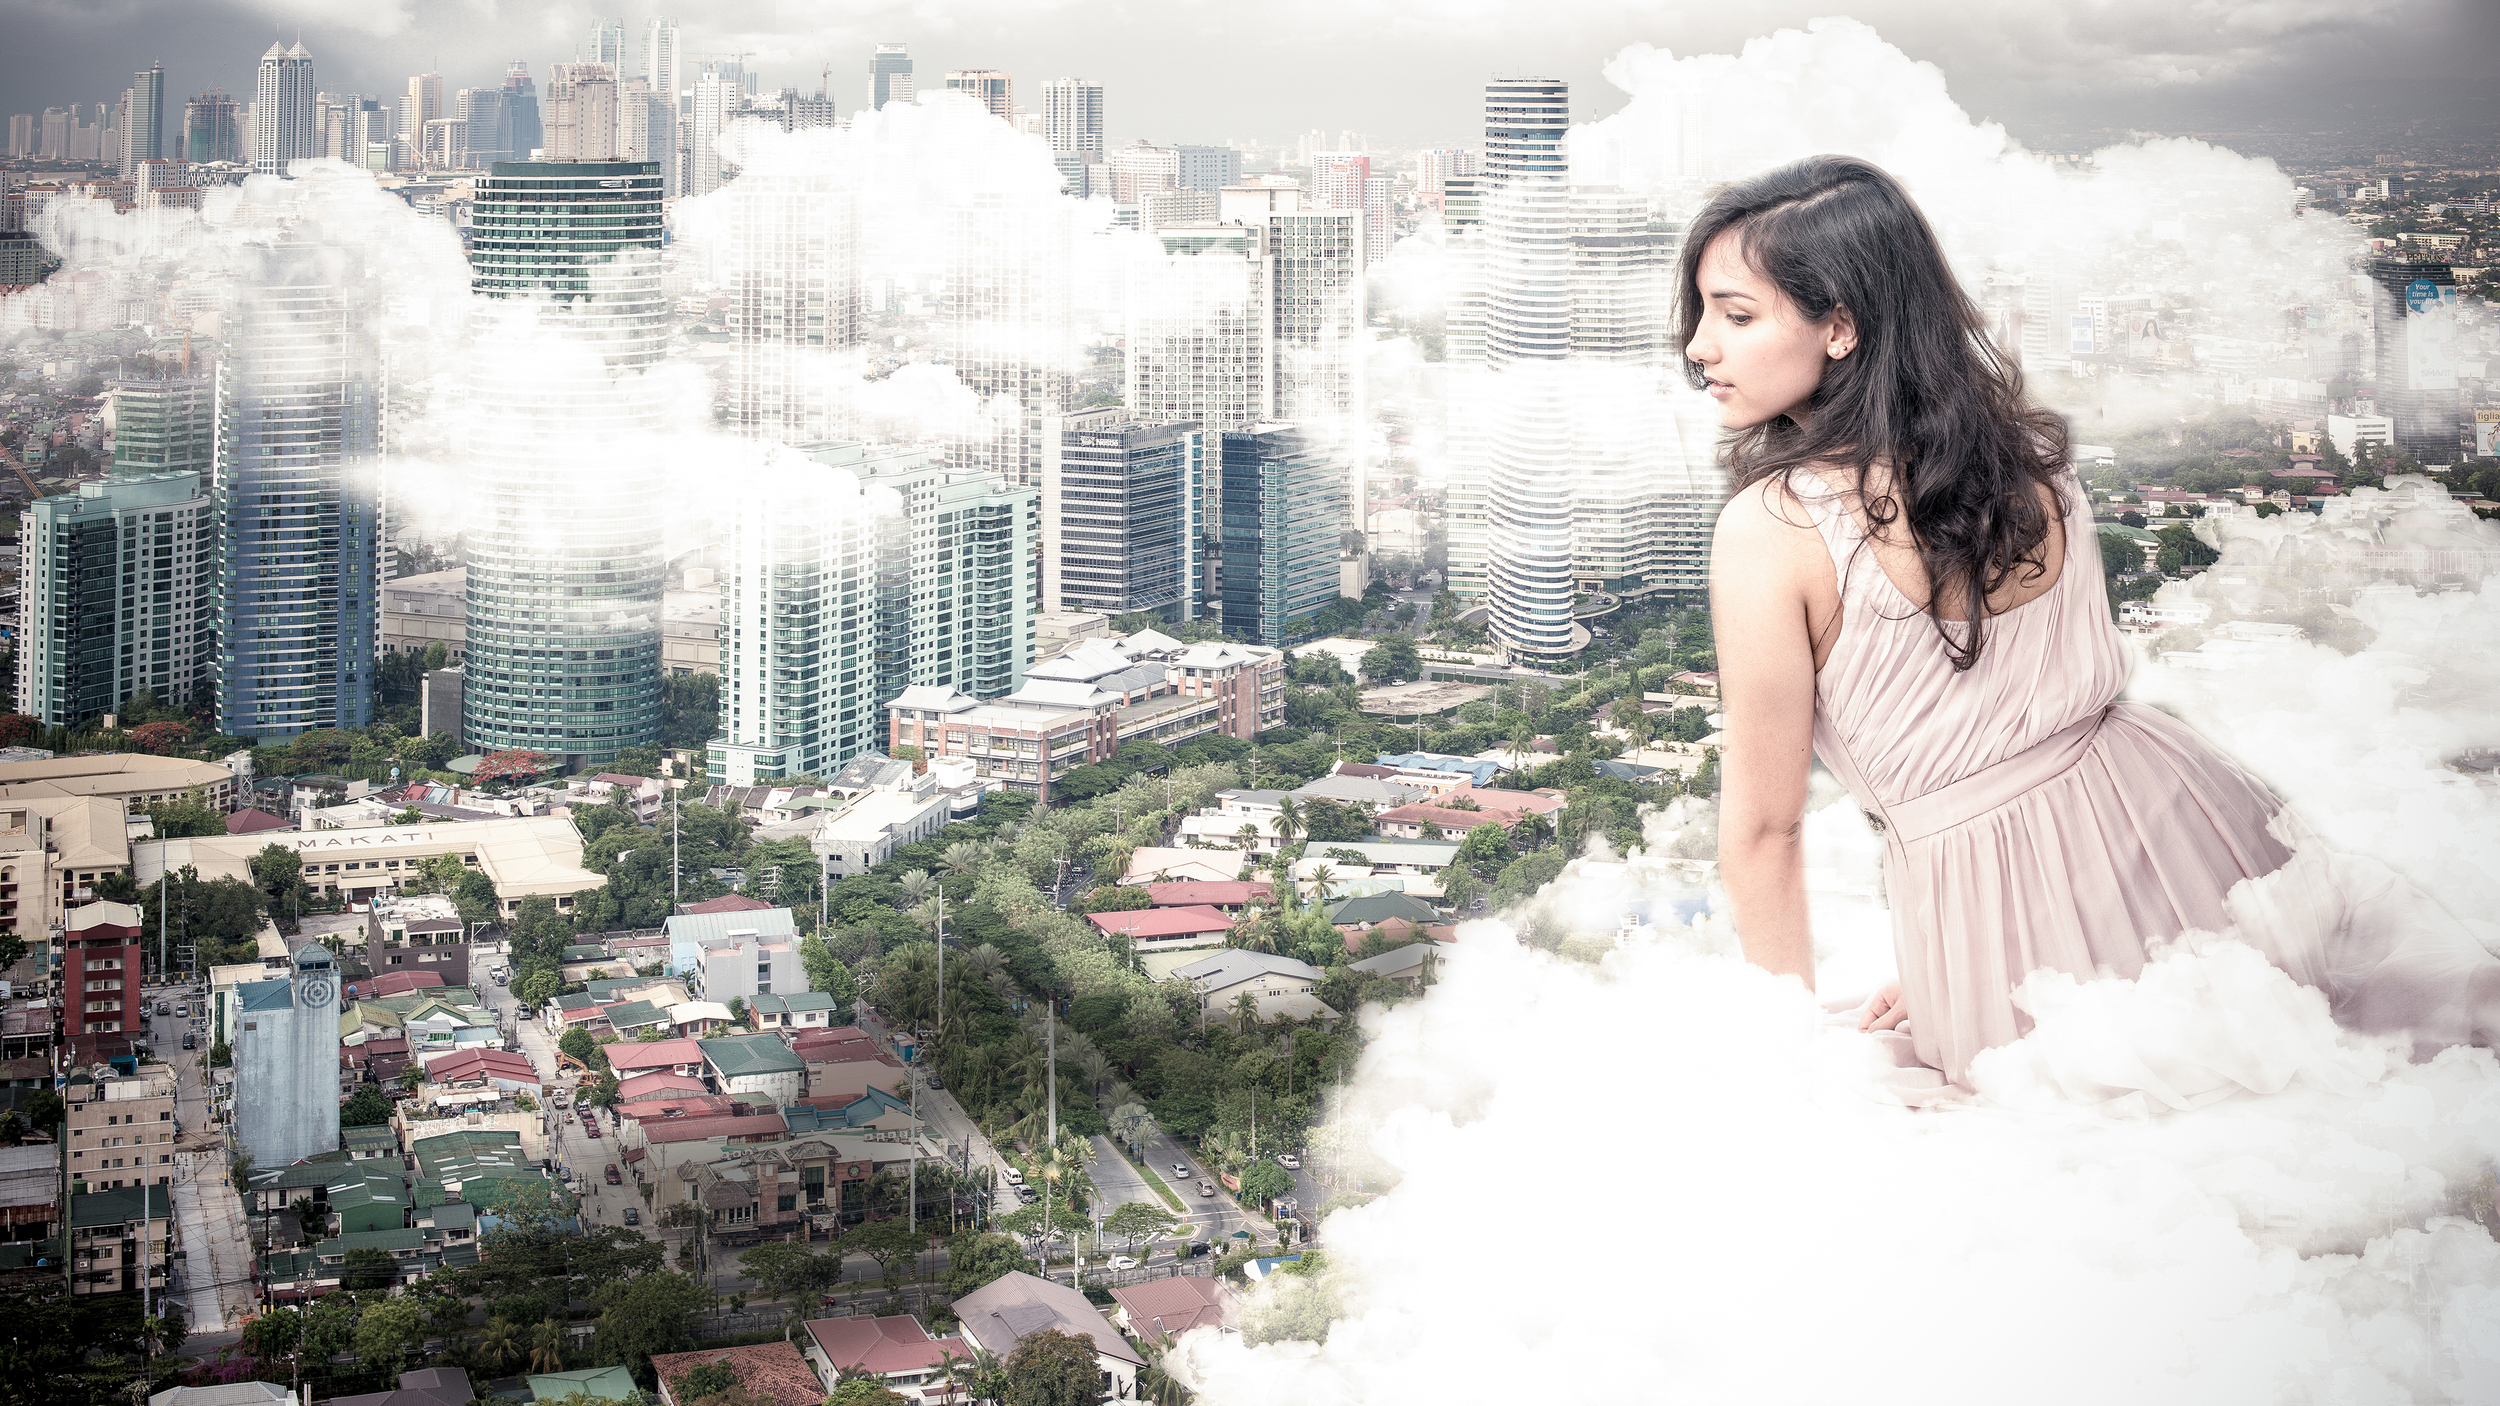
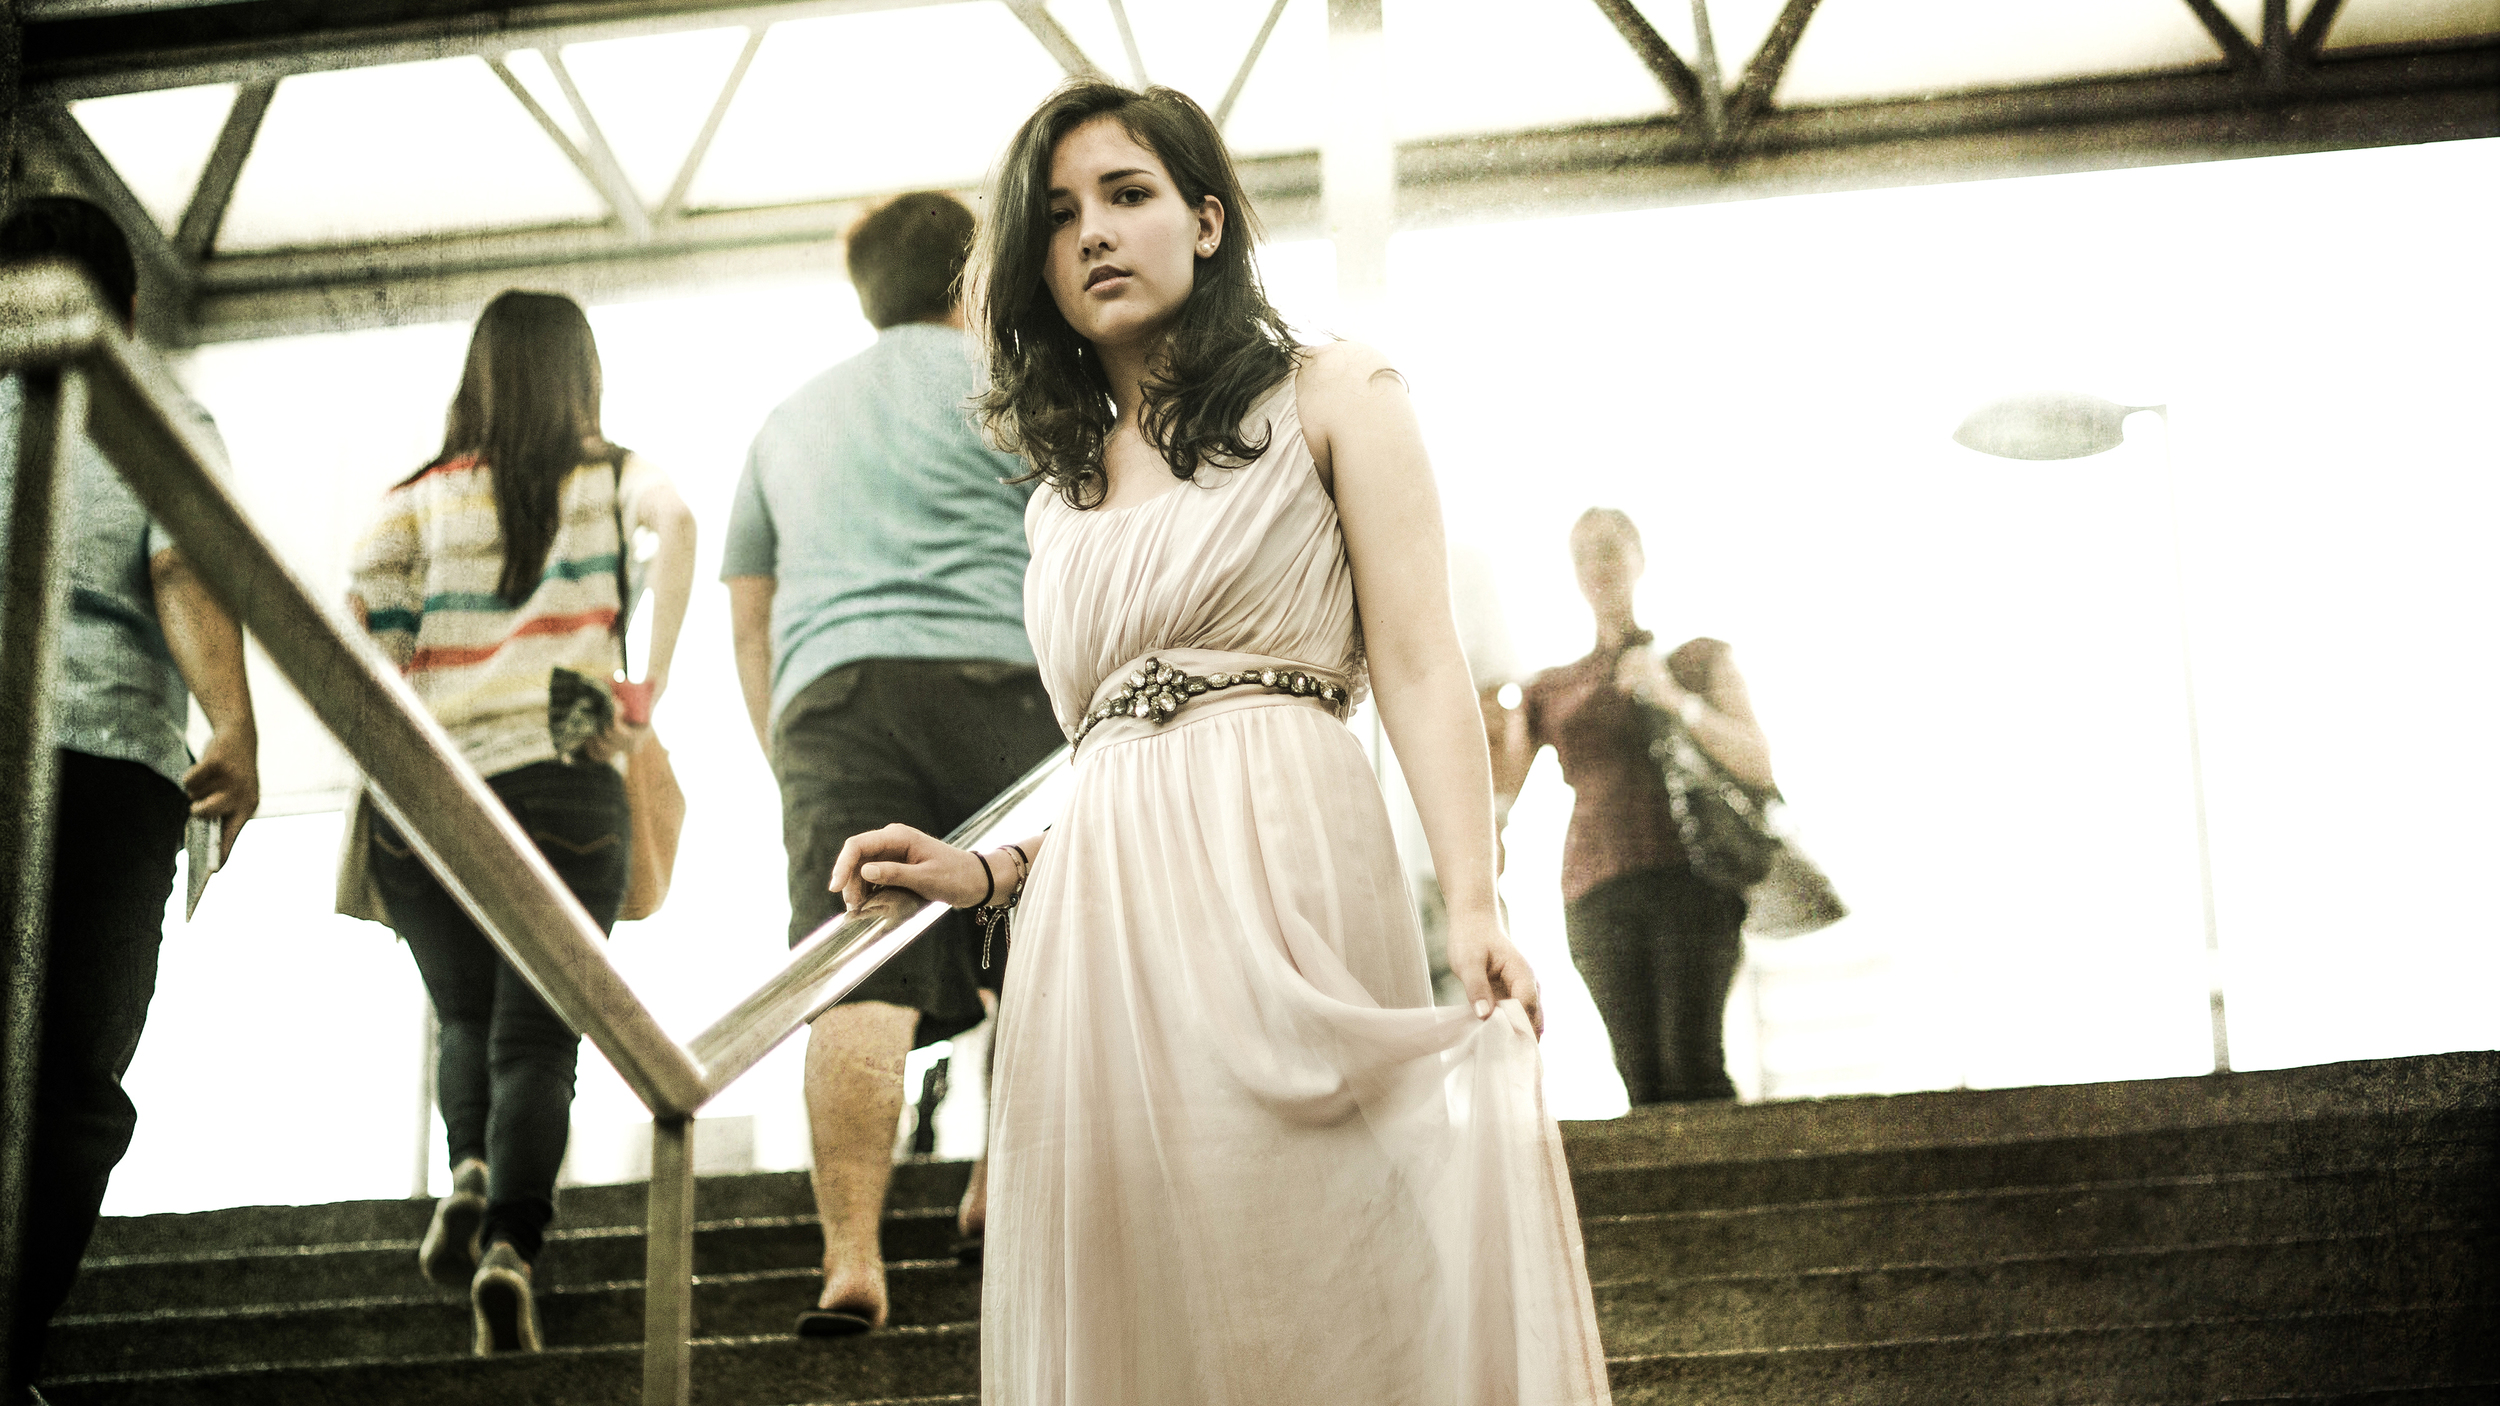
This image below is one of the photos in the series “Super” and it is entitled “Run”.

“Run”

“Run”

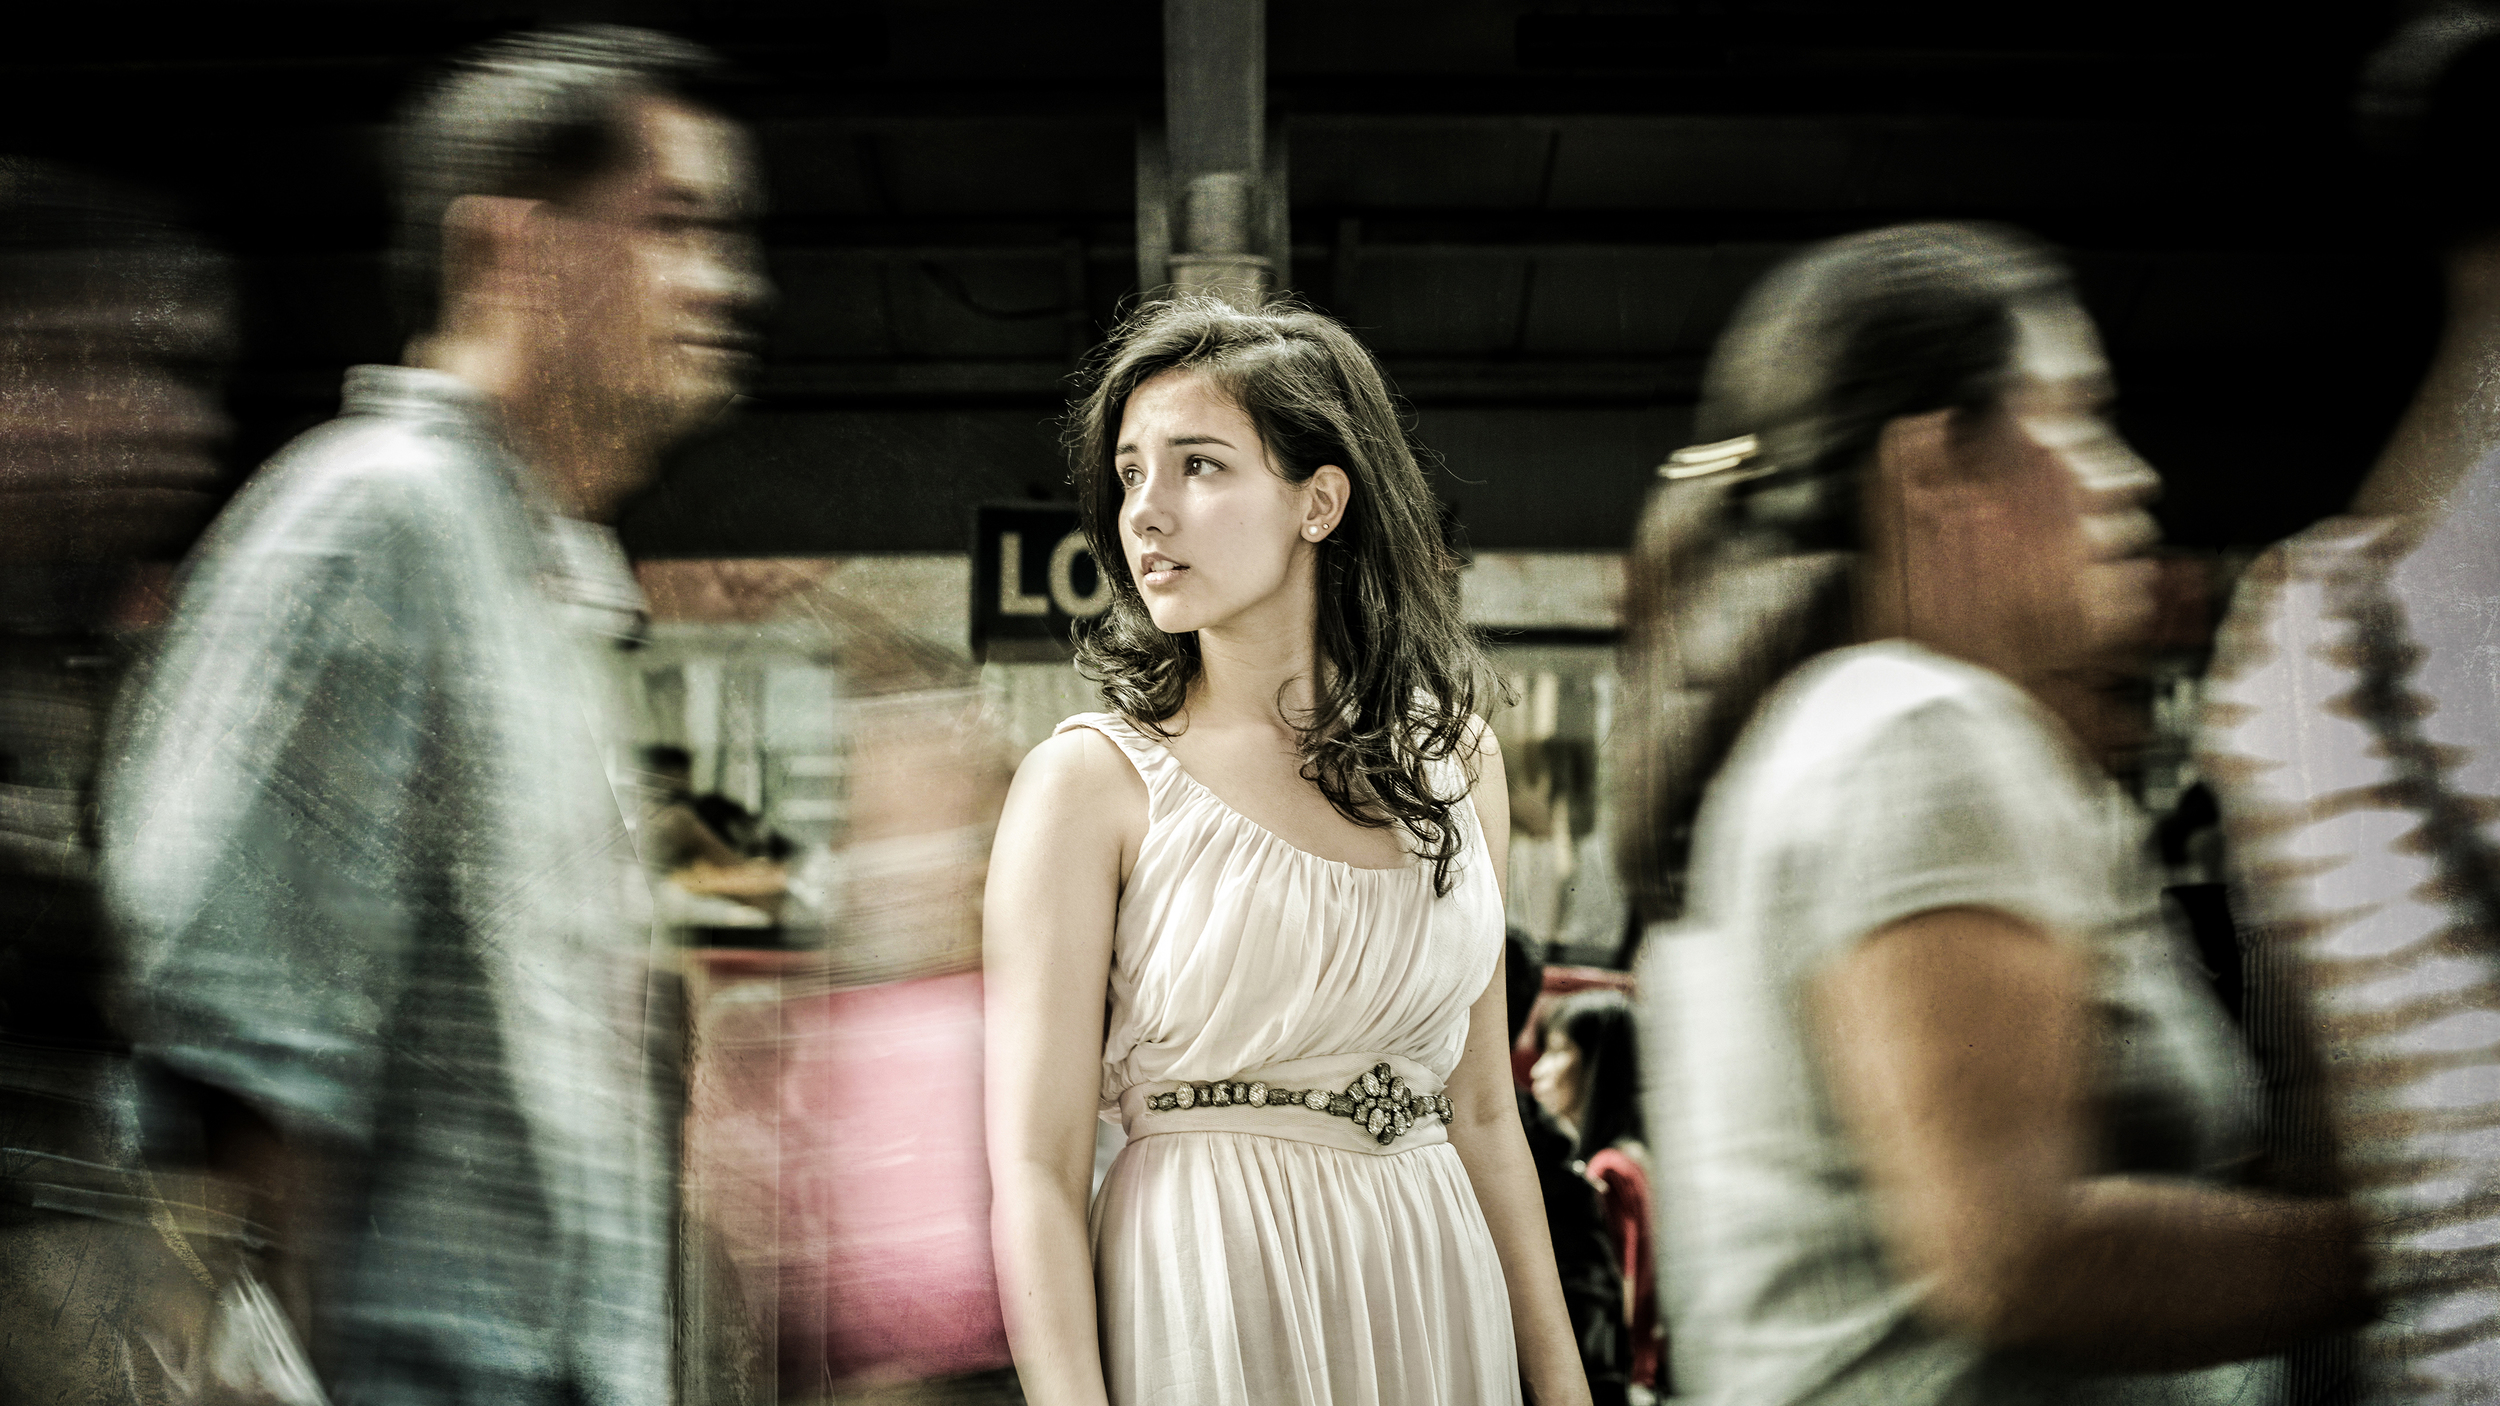
Here are the RAW images that I used to create this composite:

Nikon D90, Shutter Speed 1/640, Aperture f/7.1

Nikon D90, Shutter Speed 1/640, Aperture f/7.1

Nikon D90, Shutter Speed 1/3200, Aperture f/6.3

Nikon D90, Shutter Speed 1/3200, Aperture f/6.3

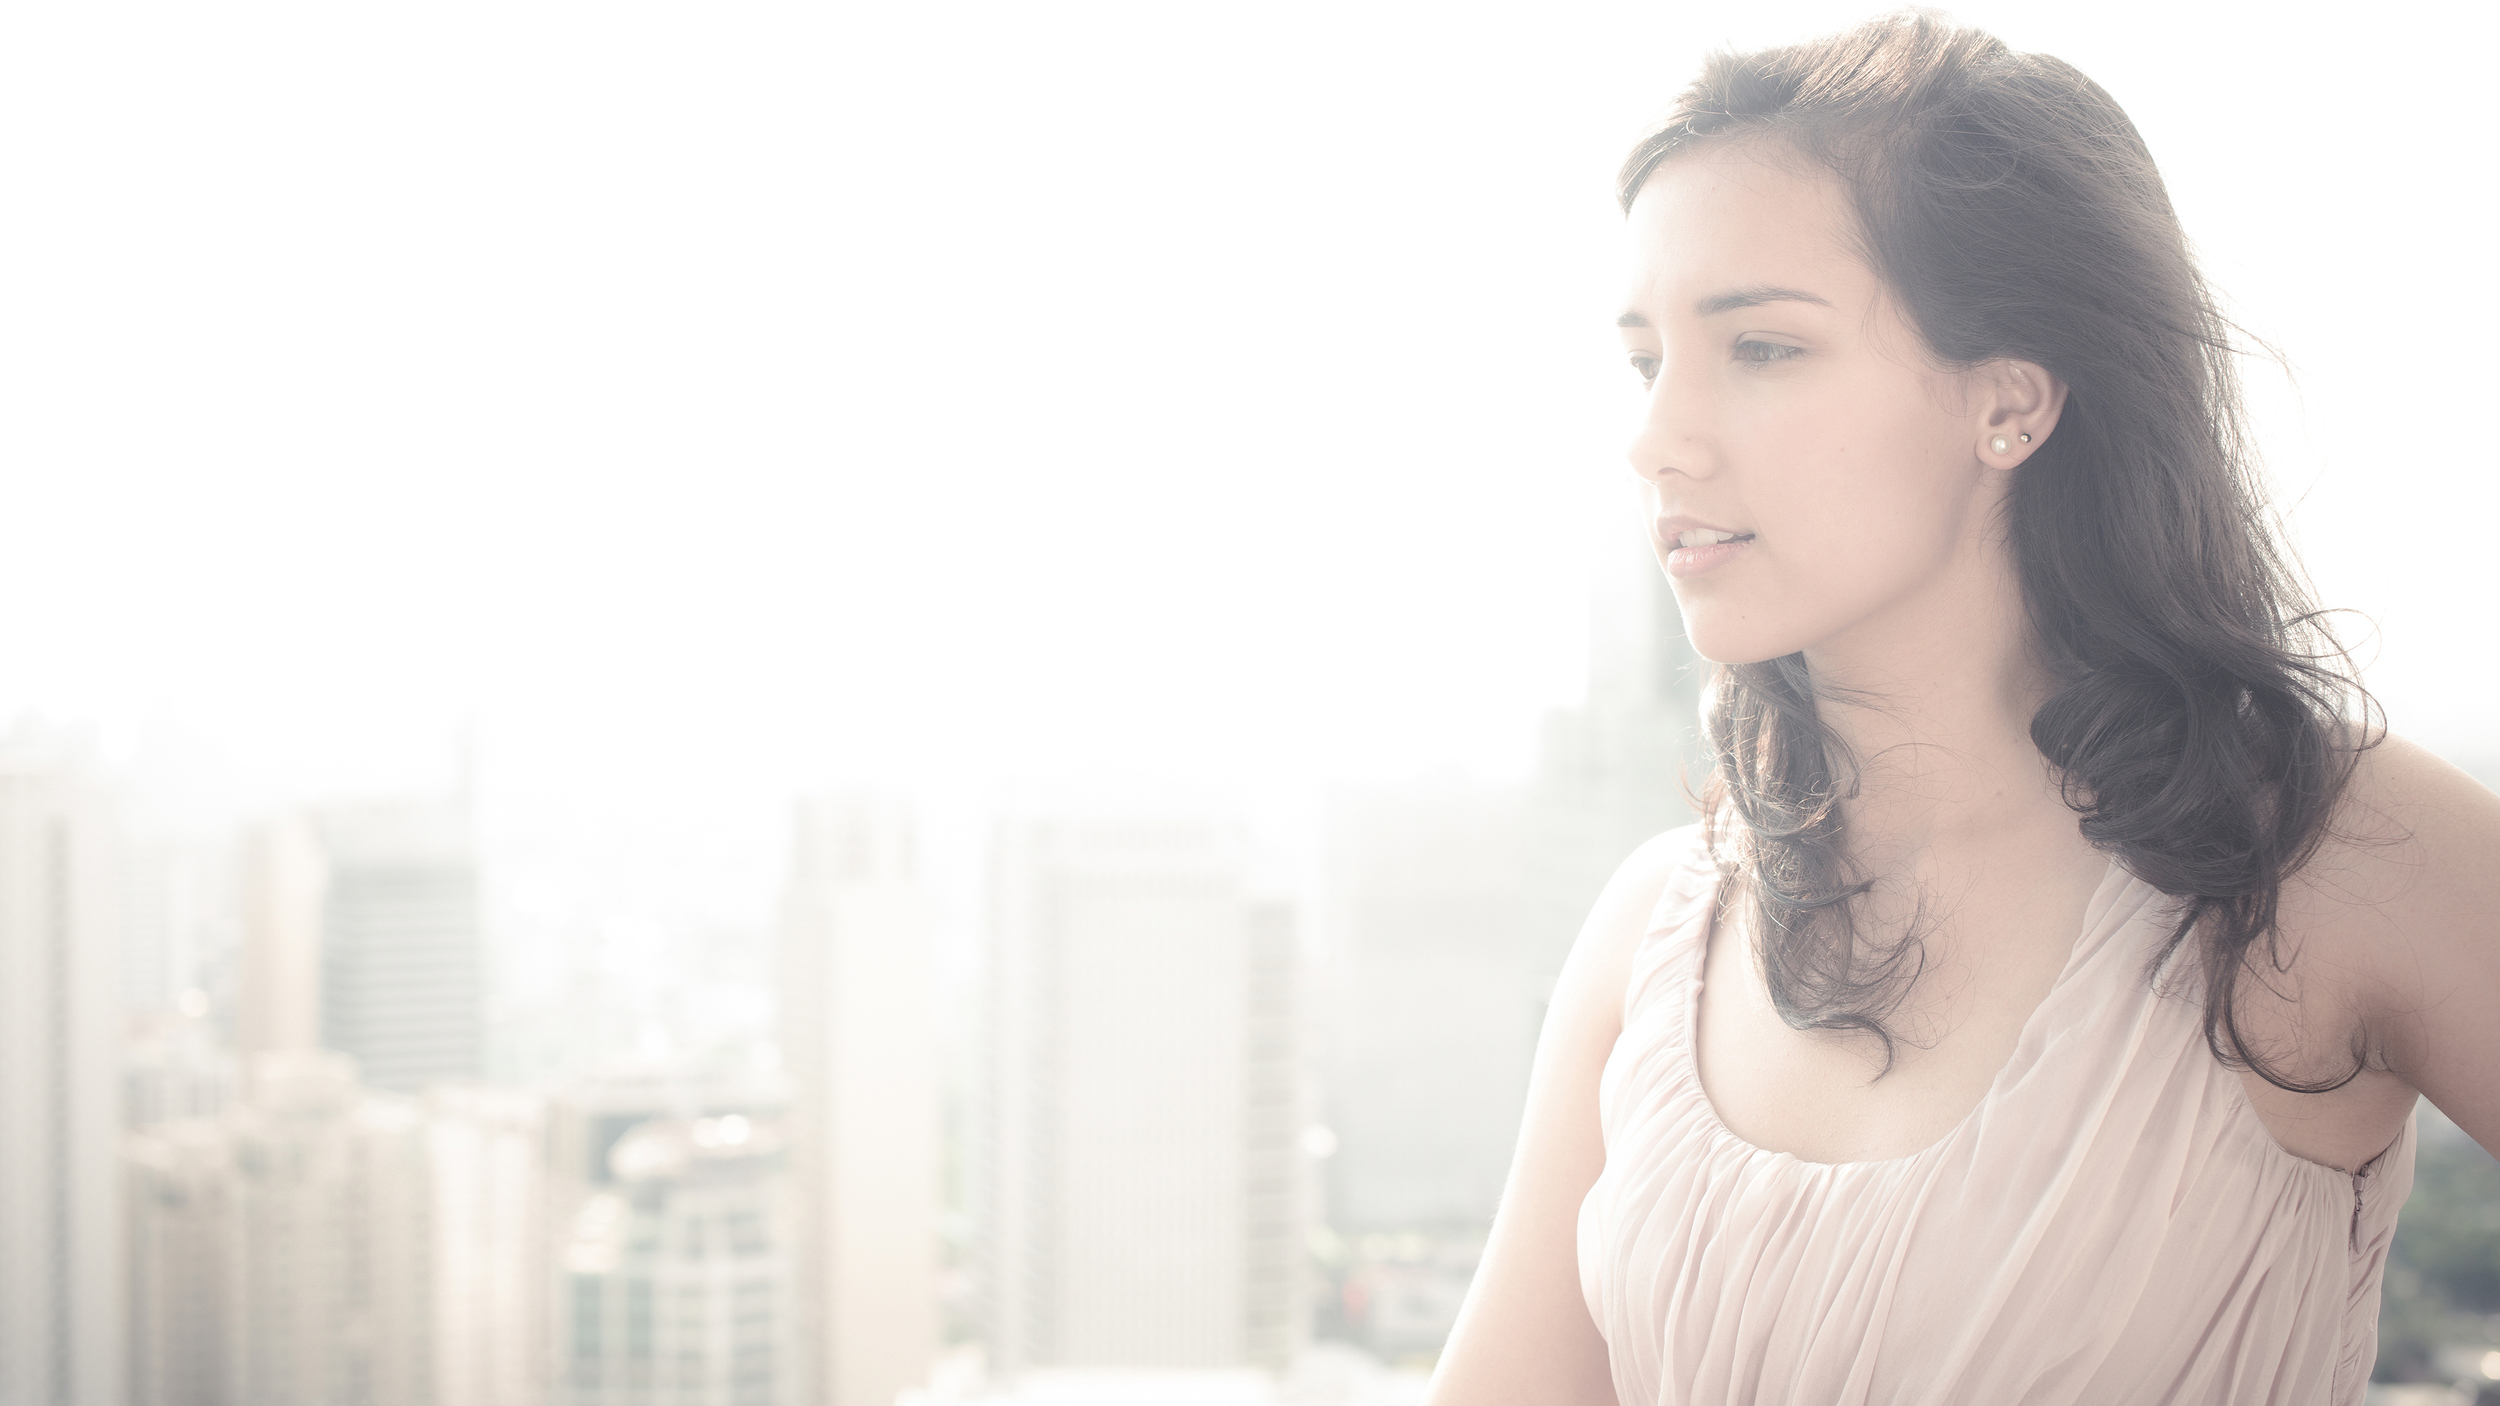
As I did not have any models around, I had to use myself. I used the timer shooting mode on my camera, enabling me to place myself in the photo. You have to be very patient when using the timer because it is hard to get the right shot right off the bat. I used the bench for what I call "placement prop". This is to ensure that the subject will be aligned with the inserted background.

Another very useful tip on making composites in to watch out for shadows. The shadows are always what gives it away for most composites. For this image above, it was very simple to incorporate an accurate shadow using photoshop. First you have to be aware of your light source and where the shadows are. To do this, look at other objects in the scene that cast a shadow and follow its direction.

I usually follow certain steps when creating shadows. First is to use the magic wand tool to select the space around the subject (when it is in a separate layer all by itself). Then inverse select and you can do this by right clicking and selecting inverse select. After that, create another layer then fill that selection with black. Then to make it more realistic, use the gaussian blur filter then decrease opacity, depending on the situation.

Like I mentioned in a previous blog post, always composite in RAW files. The secrete i to add the color correction and filters after you have finished the composite. This unifies the image and creates a more realistic composite.

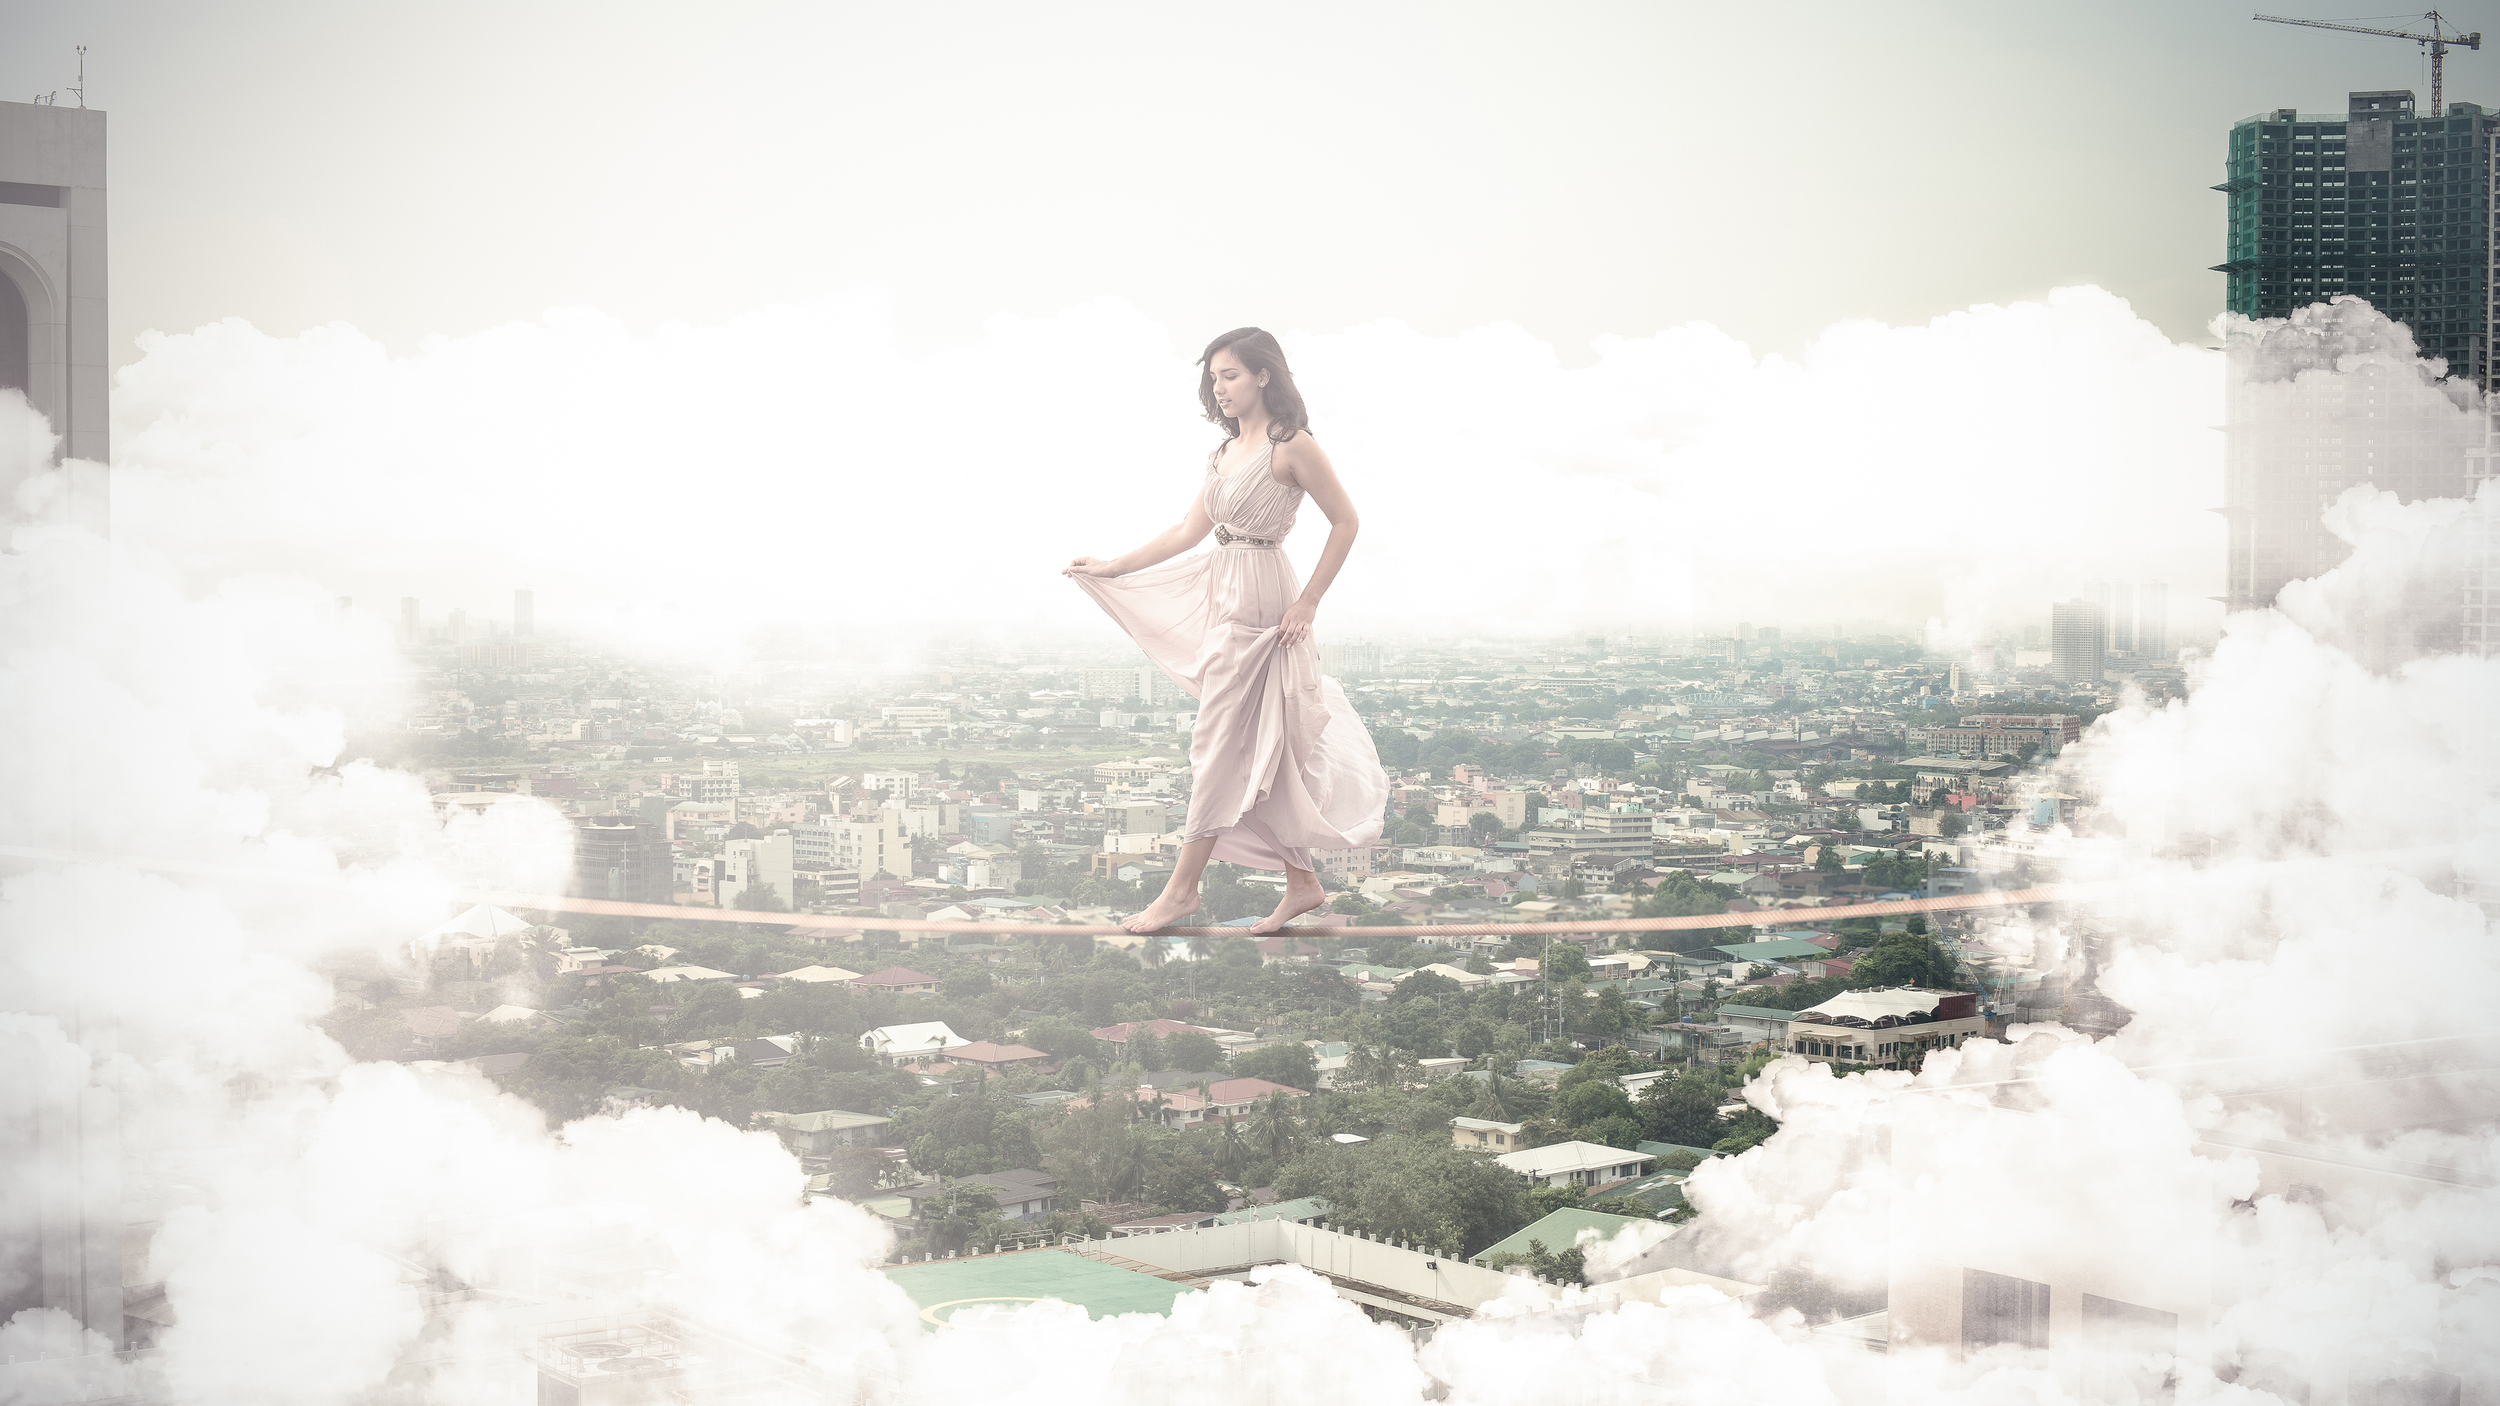
Here is another composite piece in the series entitled "Unstoppable".

"Unstoppable"

"Unstoppable"

I found the background in one of my previous folders and I thought it would make an amazing background.

Therefore, another tip I can give you when working with composites and photo manipulation is to keep all of your files. Store them in a safe external hard drive because you will never know when you will need it again for a future project. Also, always shoot in RAW because you always need that much information when working with composites.

Just make sure when you're putting images together that they have a similar light source. To make this image more realistic, I added dodging to the edges of the subject. This adds a rim light effect, which occurs when the light subject is between the light source and the camera.

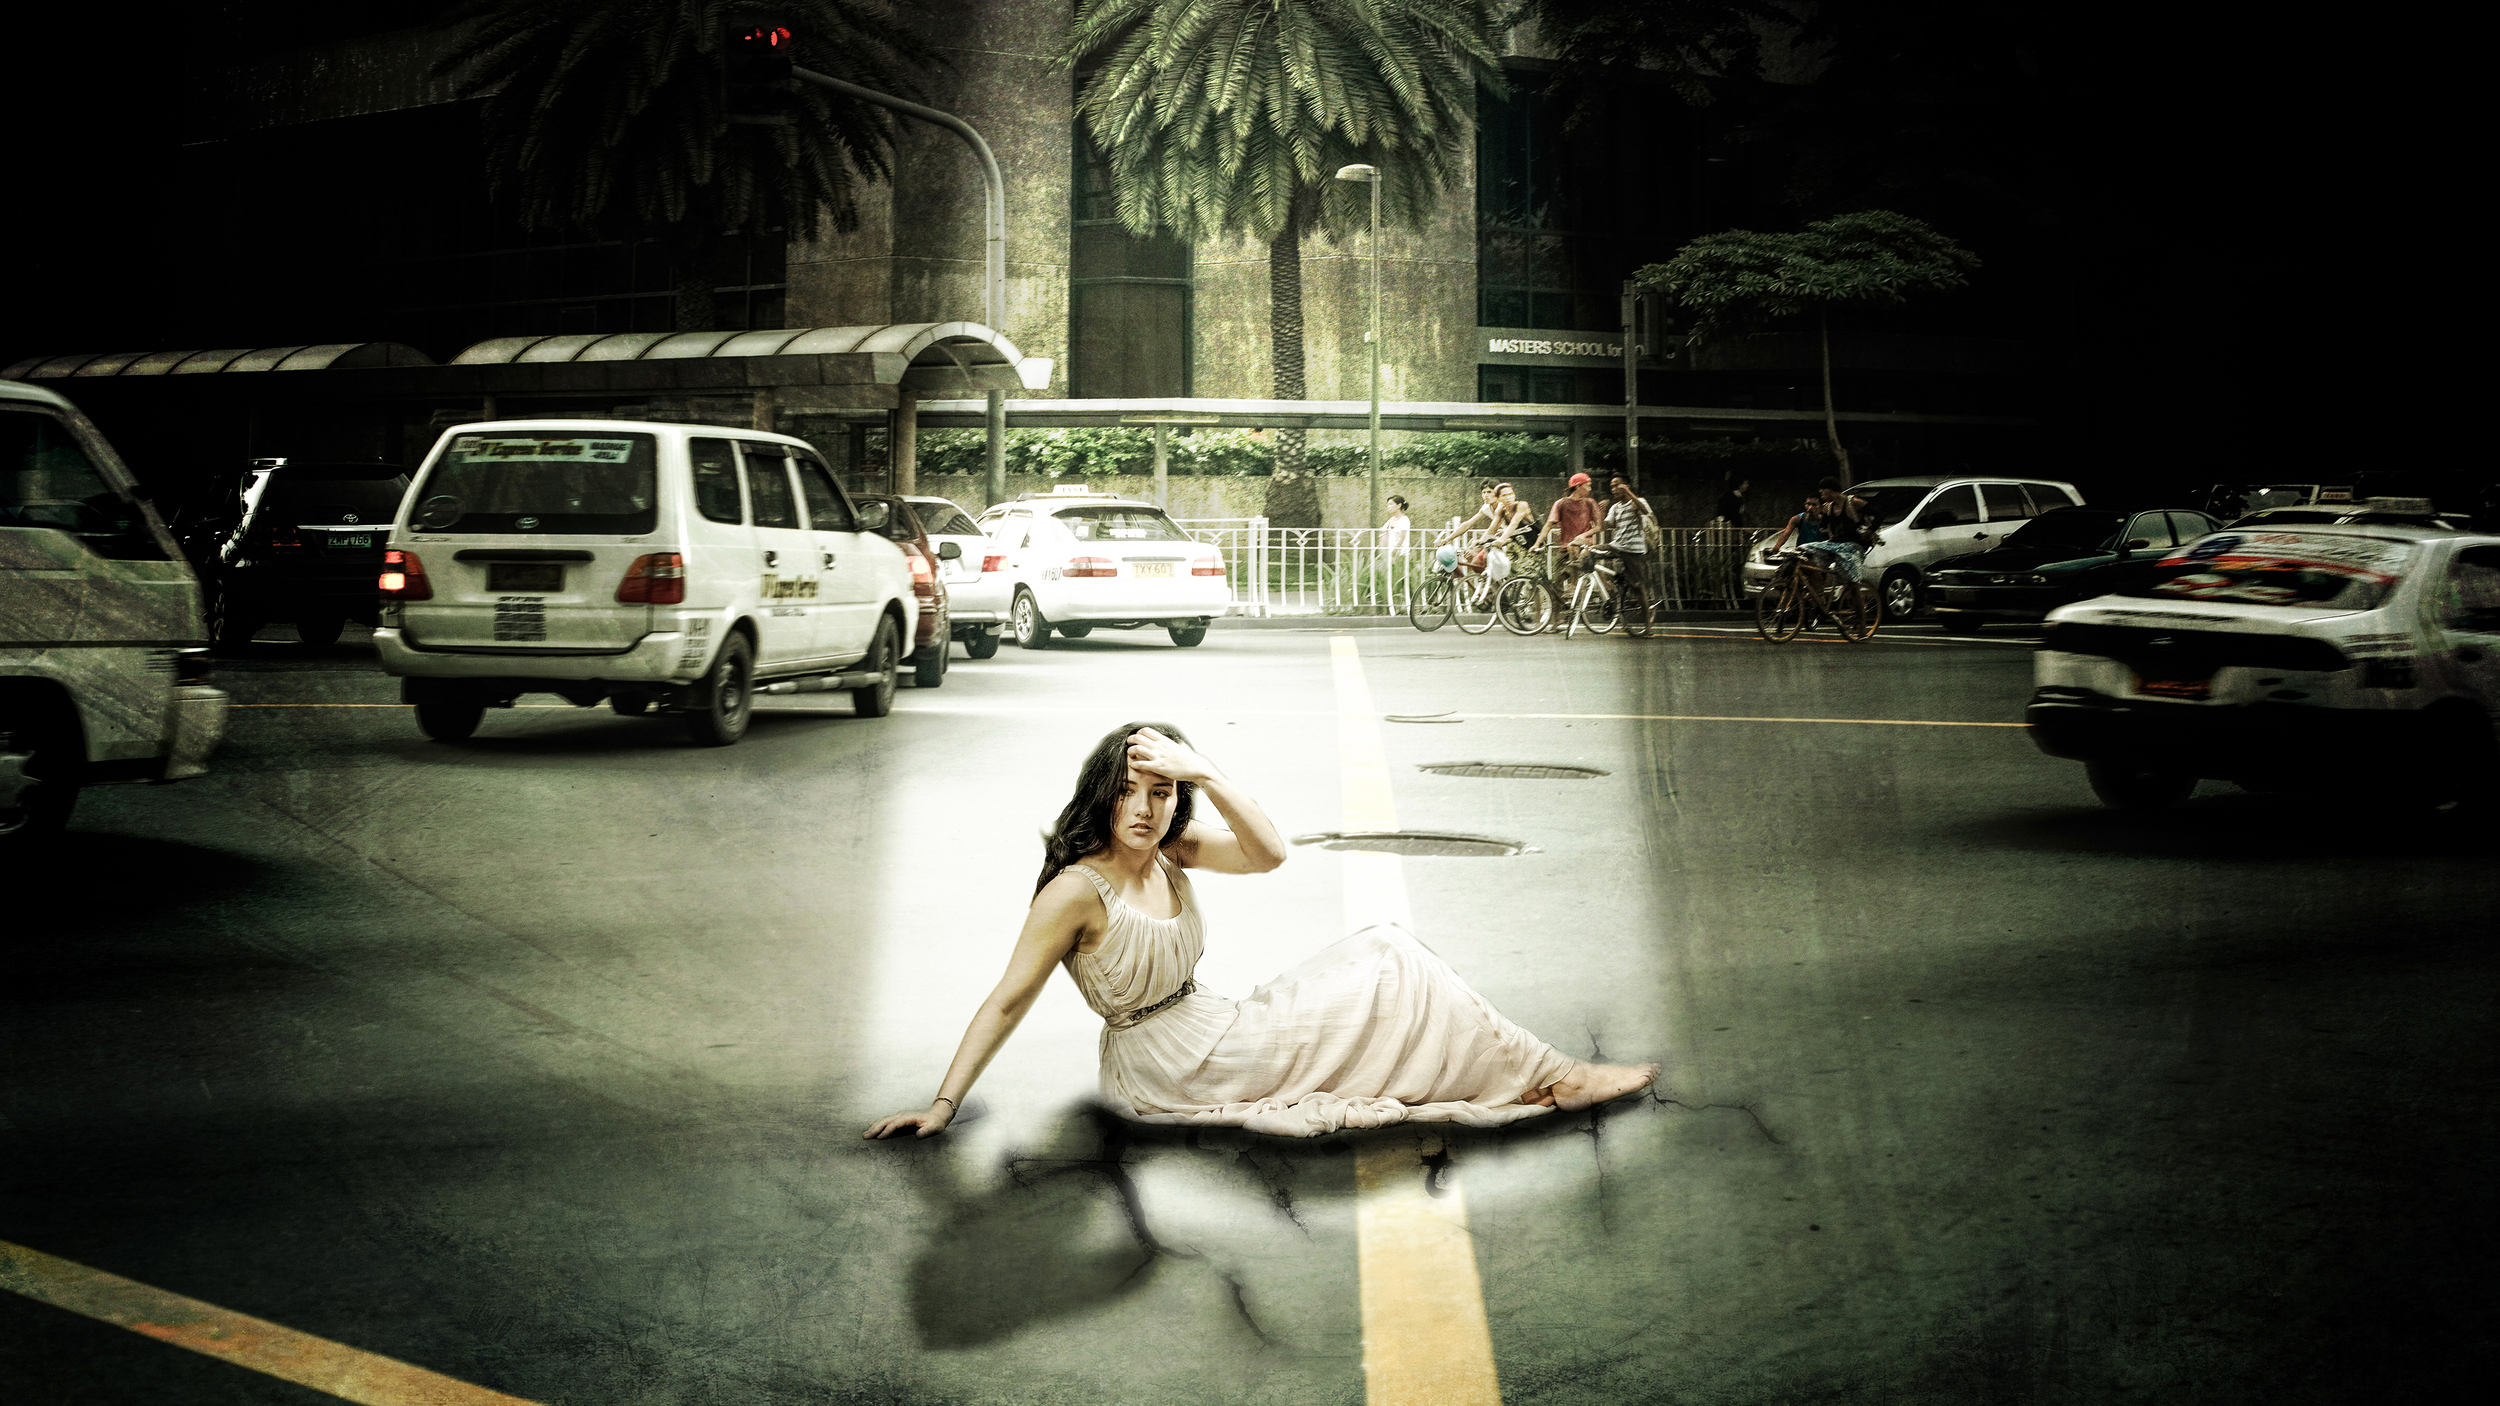
Here's the last photo of the series:

"Take Flight"

"Take Flight"

I edited these photographs mainly using Adobe Photoshop and Lightroom. If you have more questions on how I produced these images, feel free to comment here or post on my wall on facebook.

website | facebook | flickr | behance instagram

Rough Landing

This summer, I decided to use my time as efficiently as possible and start my career as a photographer. However, I wanted to approach it differently than others. Most photographers find small jobs to build up their portfolio until they gained enough exposure and experience to get bigger jobs. I wanted to continue my own path of photography by doing personal shoots that portray my own stories rather than others. In my personal opinion, you grow so much more because you are forced to think of concepts. You don’t have a stylist, a fashion director and a make up artist. Everything comes down to your own imagination.

This summer, I had my first ever serious photo shoot entitled “Rough Landing” with model Rhea Schmid. Rhea is an old friend of mine who thankfully gave me the chance to work with her. When you are starting off and trying to build a portfolio, it is best to ask any of your friends if they could model for you. It’s great to start with friends because it is more casual and you can do a lot more experimentation.

The concept for this shoot is “What happens when we think we are lost in the world, but in reality the world is the one that’s lose.”

It is based on my experience, having to study abroad in America. I went through a culture shock. I thought that I knew what living in America would be like through television and the internet. However, I could not have been more lost. That was the feeling that I wanted to portray. Watching a culture from afar and actually living in it are two completely different things.

This is the first shot of the series:

First photo from the series of “Rough Landing”

First photo from the series of “Rough Landing”

As you can see, this is a “composite” photograph. A composite photograph consists of several other photographs taken at different times and placed together in one photo through the means of photoshop or other tools. This process is called “photo manipulation”. There are many ways to create a composite photograph. You can either take the photos yourself or use stock images from websites. Personally however, the best way is to take your own photos.

Most of the time, the purpose of making a composite is to make it look as realistic as possible. The most important tip I can give you when creating realistic composites is to shoot the photos you are going to composite in the same location. This is to ensure that the lighting is consistent throughout the photo. Also, make sure that you shoot the photos in the same point of view.

For this photo, I used three different photos and composite it together. The first photo is the background.

Nikon D800, Shutter Speed 1/400, Aperture f/5.6

Nikon D800, Shutter Speed 1/400, Aperture f/5.6

The second photo are the clouds. I created this image of clouds by looking for “cloud” Photoshop brushes. When creating composites, brushes are one of the most useful tools that Photoshop offers. They are mostly free and easy to find online. When picking out brushes, make sure you get the high resolution one (at least 1500pxl).

Then the last photo is the model. I photographed the model at the same location as where I took the background. This was to make sure that I had consistent lighting. We shot on top of a condominium to get a birds eye view. As you can see, the model is laying on top of a reflector. This is to emulate the reflective quality of clouds (as they are colored white). The most important tip I can give you when working with composites is to plan ahead. Make sure that all the details of the photo match your intent.

Nikon D800, Shutter Speed 1/320, Aperture f/4

Nikon D800, Shutter Speed 1/320, Aperture f/4

All of the photos used in the composite are all in raw. No color correction was applied to them beforehand. This is important in creating unity and realism in the piece. The secret is to apply all filters and color corrections after you composite the photo to unify the piece.

I used this same composite technique for the rest of the other photos in the series. Here are the rest of the photos in the series:

If you have any questions as to how I did the other photos, just leave a comment. You can also write on my wall on facebook.

website | facebook | flickr | behance instagram

Organizing Your Own Shoot

The best way to build up a portfolio is to set up your own shoots, may it be with a model or yourself. This can get very troublesome and tricky. I went through a lot of problems and complications when planning my own shoot. I wish to share my experiences so that you can avoid the same mistakes I made.

In this segment, I will go through the whole process I usually undergo to prepare for a photo shoot.

Outtake from “Rough Landing”

Outtake from “Rough Landing”

Brainstorm and Take Notes:

For all my shoots, I plan and conceptualize way ahead of time. I write down all my ideas on a moleskin notepad. Practice your mind to think conceptually. I try to base all my ideas from my own experiences to make my own work very personal. After a few sentences of my concept, I add some thumbnails just to help me visualize my compositions and how I want it to look.

Always have a concept in mind before a shoot. Do not just take random photos and add a concept later on. If you are new in photography, you will soon learn that just taking pretty photos will not get you anywhere. You need concepts.

Deciding on a Model:

After finalizing my concept, I choose a model that will suit the role of the character I have envisioned for the shoot. I usually ask friends because they are generally easier to work with. They are also much more comfortable with experimental shoots. Perfect for learning and adding pieces to your portfolio.

You should also be ready with backup models that you can ask at a short notice. But, if all else fails and none of your models show up to your shoot, try shooting some self portraits.

Finding a Location:

I find this one of the most difficult aspects of photography. Finding a location is very troublesome as there are so many restrictions involved. There are many places, especially in the Philippines in where using a DSLR is prohibited. I never understood the logic behind these rules. However, it is still best to check before hand. One tip would be to avoid private areas and stick to public locations.

Then there is also the problem of finding a location that would suit your idea. Again, this is where having friends comes in handy. When you ask around for a specific location within your friends or your parents, you’re bound to find one that can work.

However, The biggest tip I can give you regarding location is to scout your location beforehand.

Prepare your Gear:

The day before the shoot you need to make sure all your equipment is operational. Charge all your batteries. Clean your lenses. If you are using off camera flashes, make sure that they are in working order. If you are using a tripod, make sure that you have the dove plate. Pack all of the equipment you think you will need or might need. The more equipment you have, the more versatile you can be. However, that also means the more things you need to carry around

You are more prone to lose your equipment if you have a lot of bags. So try to fit all your equipment in one or two bags.

Make a Checklist:

Create a checklist of all the equipment that you think you will need. This checklist will come in handy during the day of the shoot to make sure you have everything but also to make sure you don’t forget anything from the shoot.

Think Logistics:

You need to consider transportation for you and your model. Set a meeting place and time (set it earlier than your imagined call time to make sure everyone gets there in time). Make sure that you set the time according to the amount of light you want from the sun (if shooting outdoors).

Bring an extra amount of money just for emergency. It’s not an essential for a photo shoot but it can come in handy.

You also need to figure out if you need help from other people, especially if your camera gear is quite heavy to keep carrying around by yourself.

Outtake from “We Are Masterpieces”

Outtake from “We Are Masterpieces”

Shoots are hard to plan as there are a lot of complications and factors involved in the process. However, planned shoots yield the best results and will make your work stand out.


website | facebook | flickr | behance instagram